In here, we shall be discussing on How to Compress Mp4 Video without losing its quality. This article will give you a guide on how you can convert your mp4 videos and other file.On this page article advice that you follow us on the every bit of our article here as we guide you on how to effectively use file compressor.
This free online file compression tool lets you quickly compress files online, it supports MP4, MOV, MP3, PDF, PNG, JPG, JPEG, GIF files. No registration is required, you can compress unlimited files and no watermark is added.
ALSO READ: How to turn PC Wifi on and off in windows 7, 8, & 10
Below here are steps on How to Compress Mp4 Video using your mobile device and other devices.
How to Compress Mp4 Video
1. Create a zip file.
The most common way to compress a video is to convert it into a zip file. The file will be reduced in size, and the quality won’t be affected. Although this is a fast and easy way to compress a video, you won’t notice a huge change in file size. This feature is available for both Windows and Mac users:
- Right-click on the video file:
- Windows users, choose “Send to > Compressed (zipped) folder”
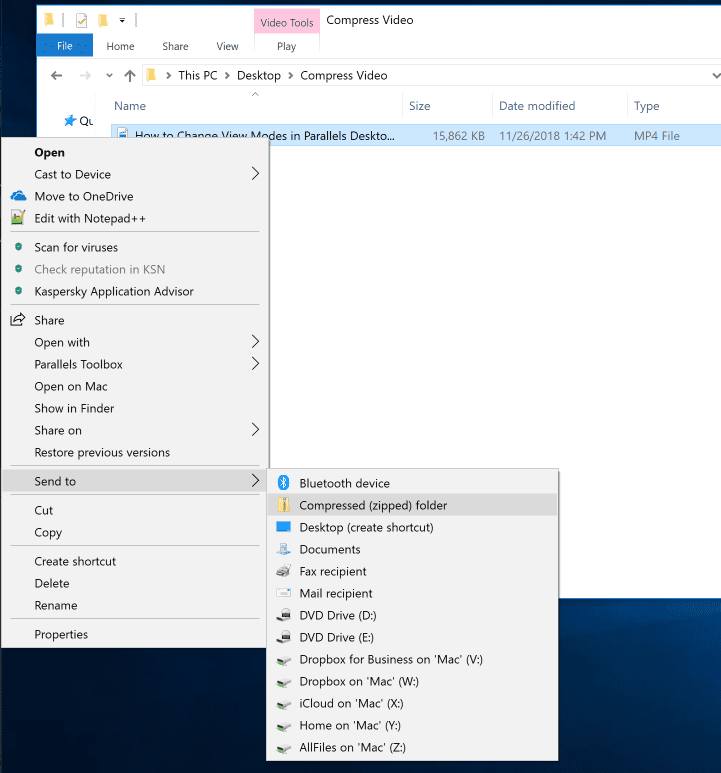
Figure 1: Creating a zip file in Windows
- Mac users, choose “Compress name”
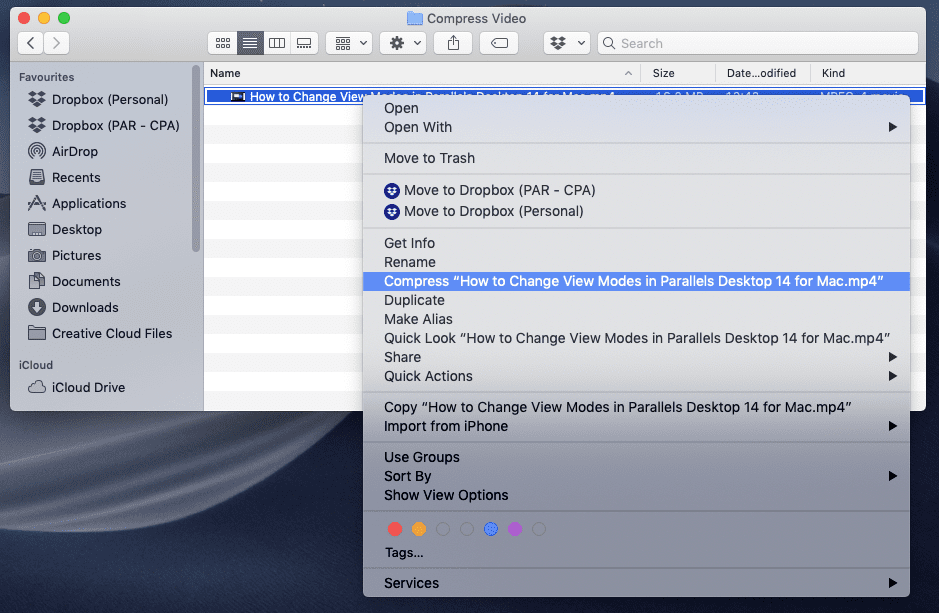
Figure 2: Creating a zip file for Windows users
- The file will automatically be compressed.
2. Make a video shorter and smaller with iMovie on Mac.
Most Mac devices now come with iMovie, the free movie editing tool from Apple. With iMovie, you can shorten your video and only send a part of it, obviously decreasing the size of the file. Additionally, iMovie contains a feature that prepares your file for e-mail which helps compress it for sending:
- Open iMovie and click on the arrow in the top left of the menu bar.
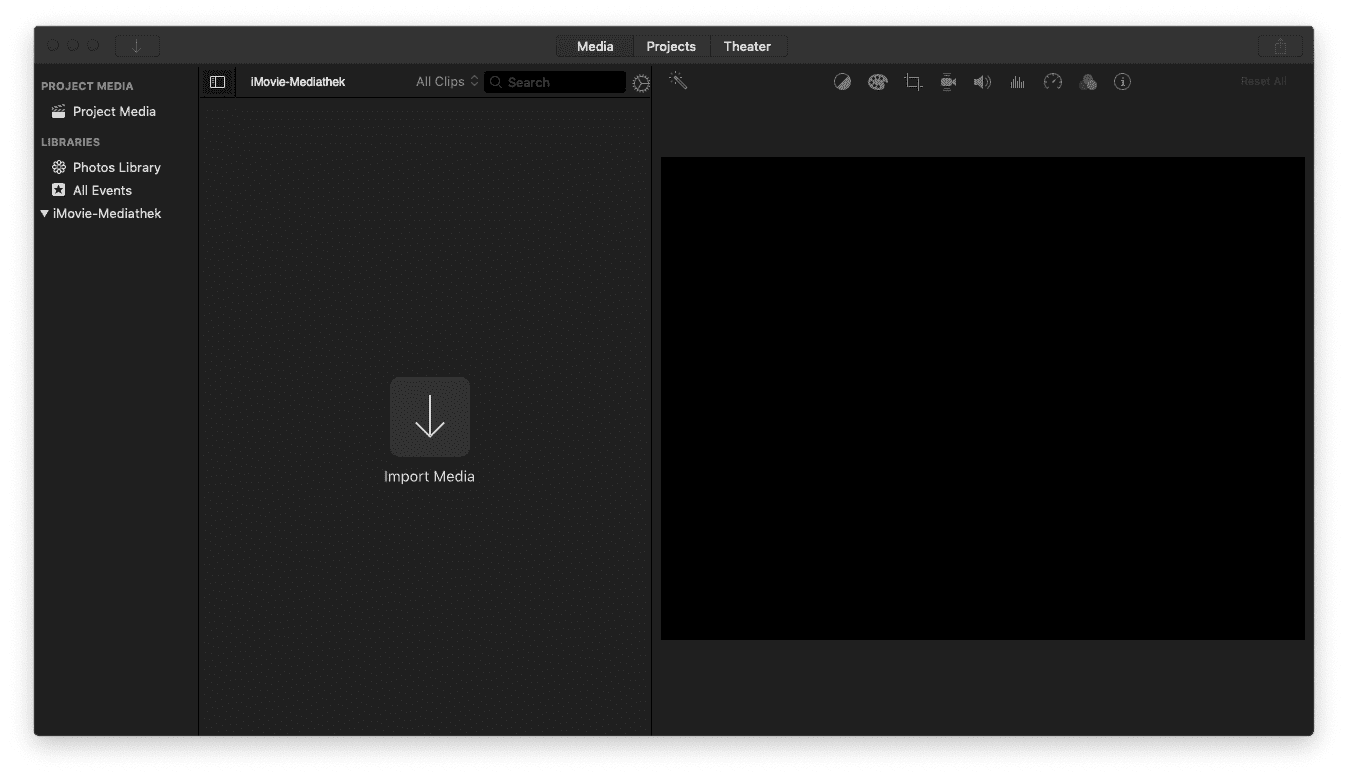
Figure 3: Open iMovie to make your video smaller
- Choose the file you want to import on your computer and click on “My Movie”.
- Select the portion of the video you want to use and click “+” (Add the section to the movie).
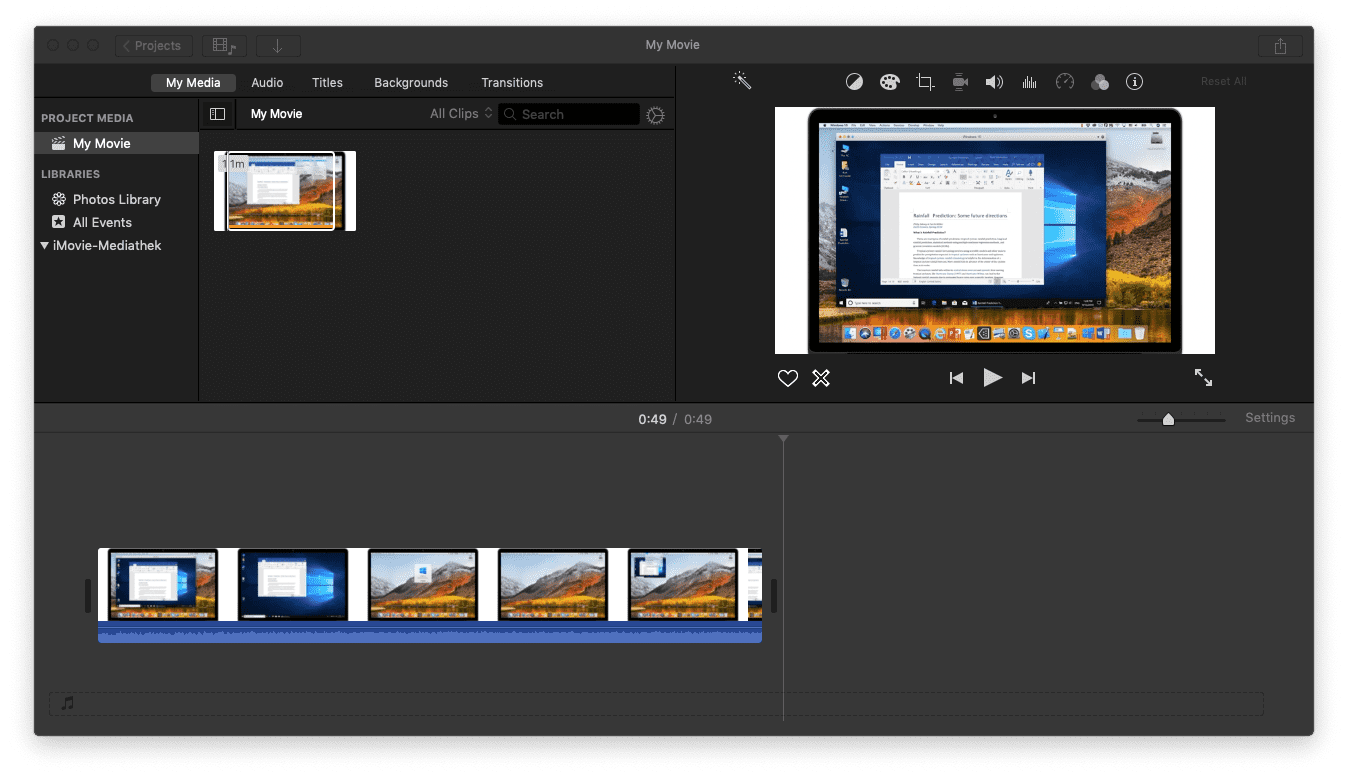
Figure 4: Choose a portion of the video in iMovie
- To export, click “File > Share > Email” and choose “Small” to decrease the file size.
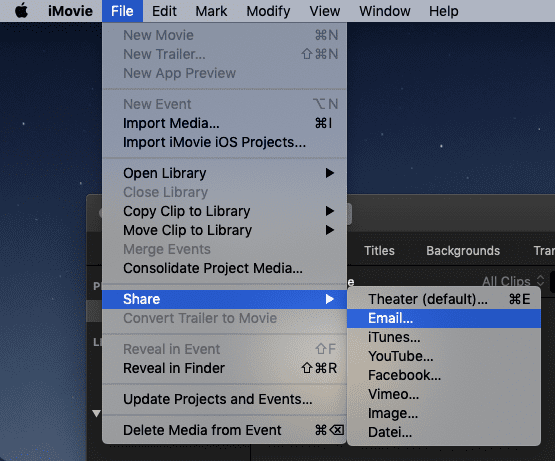
Figure 5: Share your file by Email in iMovie
- The smaller file will now open in a blank e-mail, ready to send.
3. Download a video in a lower quality.
To download a video from the internet in a lower quality, and therefore a smaller file size, follow this easy procedure for Windows and Mac:
- Get the “Download Video” tool as part of Parallels Toolbox Screen and Video Pack or as a stand-alone tool.
- Open “Download Video” and click on the settings wheel on the top right.
- Select the preferred quality: “Low, Normal, High, or Max”, and then click “Done”.

Figure 6_ Different qualities in Download video from Parallels Toolbox
- Copy and paste the link to your video file into the tool (various video sharing site links are supported, including Facebook, YouTube, Vimeo, and more).
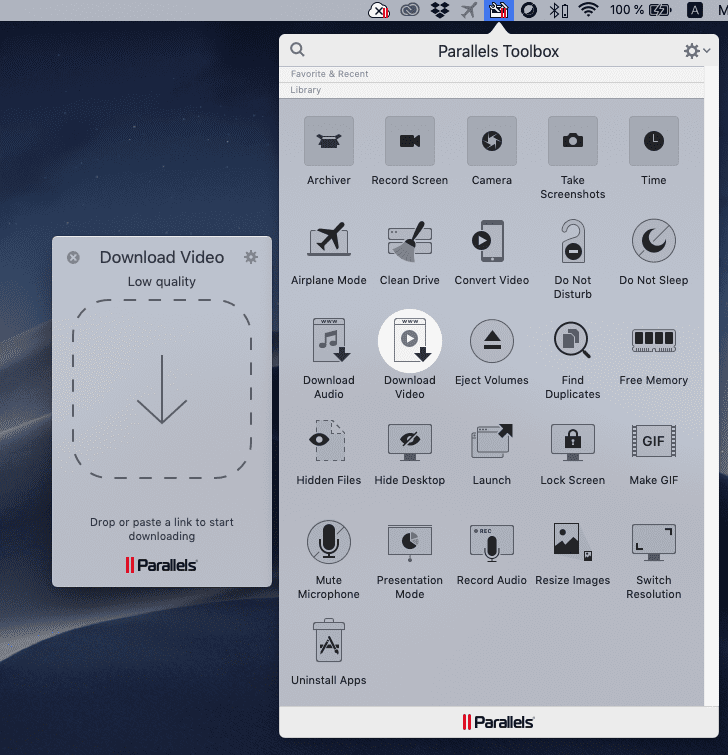
Figure 7: Download a video with the tool Download Video in Parallels Toolbox
The video will download quickly. You can download a complete playlist, or multiple videos with just one click:
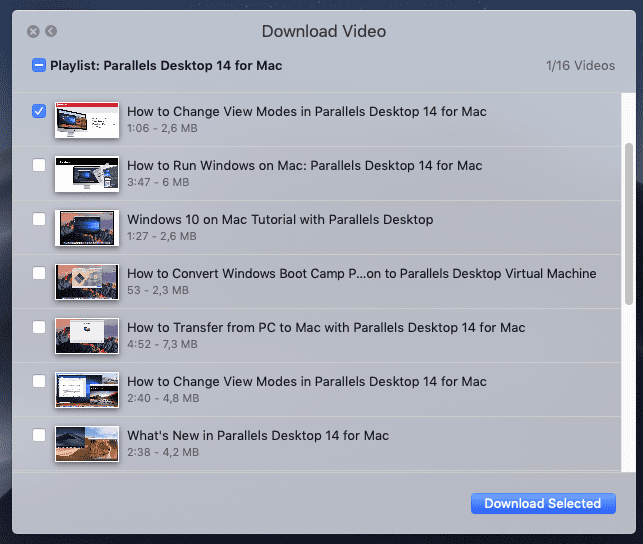
Figure 8_Download a complete playlist
Downloading a file in a low quality compared to high quality can have a huge impact on the video size:
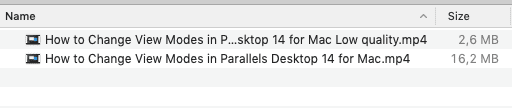
Figure 9: Download a video in a low or high quality
Download a free trial of Parallels Toolbox and try “Download Video”, along with 30+ easy to use tools, all in one simple interface.
4. Use a cloud service.
Dropbox, Google Drive, One Drive, and others are cloud services that enable you to share big video files easily. They all work more or less the same way, by first registering an account then downloading the desktop client, or accessing the service online. Then you can upload the video file and share the generated link by e-mail with your colleague or friend.
5. Share a video link without uploading.
Parallels Access has a feature, “Share a file” which allows you to share large video files in just a few clicks, without needing a cloud service or uploading the file to your Mac or PC. You simply generate a link to your video and send it to your contacts, with the option of adding a password and expiration date:
- Download Parallels Access and activate.
- Right-click on the video file that you want to share and select “Share > Parallels Access”
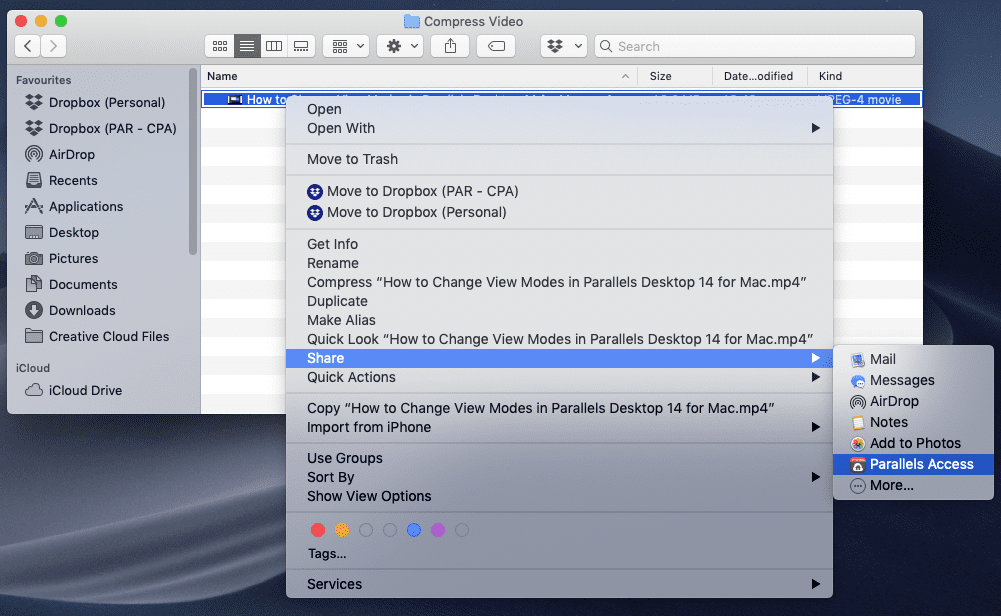
Figure 10: Share a file with Parallels Access
- Add a description and password (if preferred) and click on “Share”
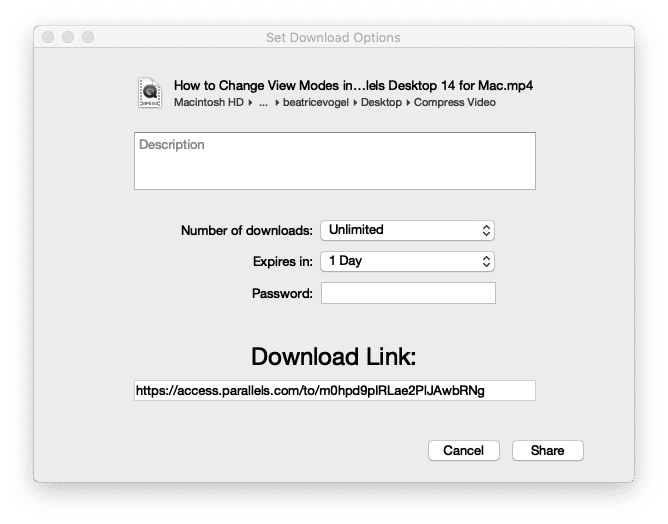
Figure 11: Share your video file by E-mail
- A link has been generated that you can share with your contacts via e-mail. They simply click on the link and download the video before the link expires.
6. Make a GIF.
GIFs are playing an increasingly important role, especially on social media. A GIF is basically a mini video, with no sound, that can be watched in just a few seconds. Making a short, animated GIF out of your video will definitely decrease the size, and it can be fun to create:
- Open the tool “Make GIF” from Parallels Toolbox.
- Drop or copy your video to the tool.
- Select the part of the video you want to make a GIF from, add text, and choose the auto-looping direction.
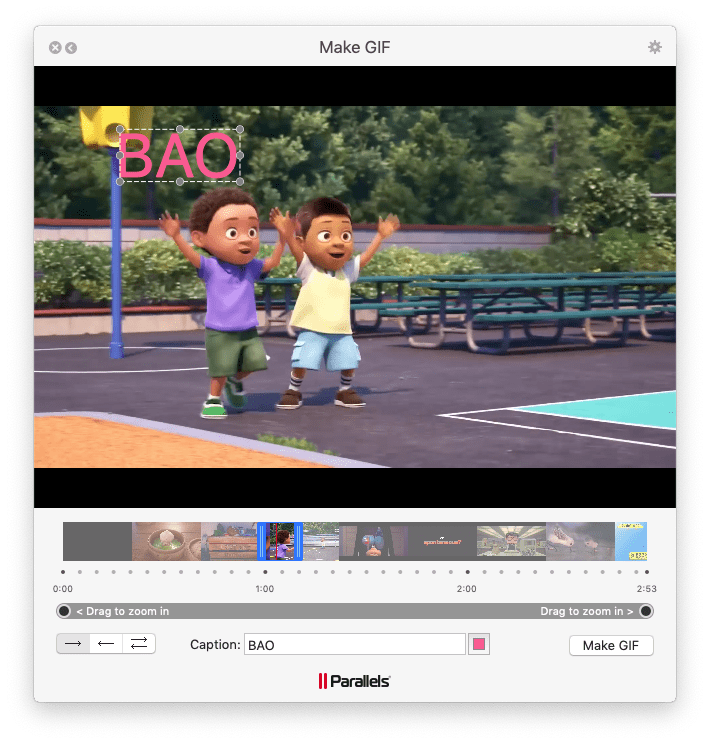
Figure 12: Make a GIF out of your video
- Click on the settings wheel to set the preferred size and frame rate per second (fps).
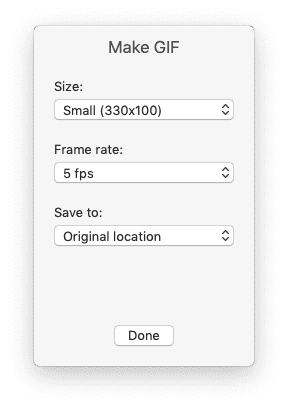
Figure 13: Different “Make GIF” settings
- Click on “Make GIF” and in less than a minute, your GIF is created. You can send it to your friends or colleagues via e-mail.

Figure 14_Create your GIF in less than a minute